Saturday, 8 December 2012
Restore WordPress Blog using Duplicator plugin with Database.
Labels:
Tips and Tricks,
Website

Anyways, I figured out my way with the Duplicator Free Plugin, this is a plugin which gives you the option to restore your full site without any hassles on your part, so i thought to write a good tutorial for this, so, lets get to work, in this tutorial the emphasis is on restoring the backup as generating the backup is too easy :-
1. First install Duplicator Plugin on your WordPress Blog.
2. Go to the Duplicator window on your Admin Dashboard and click on create button, this creates a .zip backup package and an installer.php script file, download both of them or you can transfer them to your new hosting cPanel X using Remote ftp transfer. (Note: For Restoring the WordPress blog, you must ensure that there are no other sites or files in the new hosting account,i.e. the file manager should be empty apart from the installer.php script and the .zip backup.)
3. Now change your name-servers to point to you new hosting account and till it propagates across the web, go to your new cPanel X and go to my sql databases and create a new database, say for this tutorial we assume it to be database_1. Then create a new user , say user_1, and add this user to the users of the database_1 and give all permissions to this user,and remember the user_1's password for future reference.
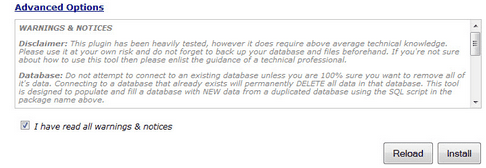
4. Open restore script installer.php by opening URL example.com/installer.php in your browser and wait for the script to load properly, now you will see a form,the data entered here has to be correct for your blog to function correctly, so be careful.
5. Now on the user and password fields enter the user_1 and its password which you had created in step 3.
6. In the Database name field enter the name of the database which you had created in step 3 i.e. the database_1, and you may even click on the test connection button to test if the database and password of the user_1 are matching perfectly.

9. Check the process and then delete the installer.php etc. files which are given in the instructions.
So, hopefully you would be done by now, if you are happy with this post then you may check out our other articles too here, if you have some other problems then comment below.
Protection of You Online Identity - 6 Easy ways to protect your online identity
Subscribe to:
Post Comments (Atom)


Good tutorial and excellent writing..
ReplyDeleteThanks for Reading through ..
DeleteI should bookmark this. Really useful article.
ReplyDelete(I know how hard it is to manually migrate database after changing the server)
True, I know what it feels :v , that's why i wrote this article for others as there was no other good documentation for duplicator, when i needed it most
DeleteThanks for your article. Does duplicator rename all the asset URLs? E.g. if I have a link to a PDF such as http://www.testdomain.com/.../1.pdf would that be converted to http://www.livedomain.com/.../1.pdf after running the installer?
ReplyDeleteThanks.
Yes The Links will be changed accordingly :)
Deleteit's really usefull.
ReplyDelete